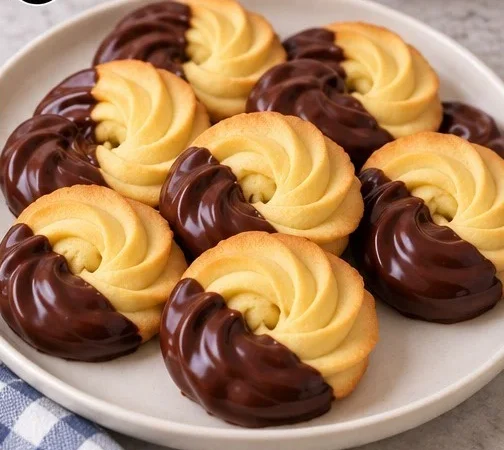
Chocolate-dipped butter cookies have become my absolute favorite way to impress guests without spending hours in the kitchen. Moreover, there’s something magical about these golden vanilla cookies with their elegant chocolate coating that makes every occasion feel special.
What Are Chocolate-Dipped Butter Cookies?
These delightful treats are essentially buttery vanilla cookies piped into beautiful ridged rings and then half-dipped in rich dark chocolate. Furthermore, the contrast between the tender, crumbly cookie and the smooth chocolate coating creates the perfect bite every time. Additionally, they look incredibly professional despite being surprisingly simple to make at home.
What You’ll Need for Perfect Chocolate-Dipped Butter Cookies
The beauty of these chocolate-covered butter cookies lies in their simplicity. Therefore, you’ll only need a handful of pantry staples to create something truly spectacular. However, quality ingredients make all the difference in the final result.
For the Butter Cookies:
- Unsalted butter (1 cup, softened): The star ingredient that gives these cookies their rich flavor. Alternatively, you can use European-style butter for extra richness.
- Powdered sugar (¾ cup, sifted): Creates the perfect tender texture. Similarly, you can substitute with granulated sugar, but the texture will be slightly different.
- Large egg yolk (1, room temperature): Adds richness and helps bind everything together. Consequently, make sure it’s at room temperature for best results.
- Vanilla extract (2 teaspoons): Pure vanilla works best, though imitation will do in a pinch.
- All-purpose flour (2 cups): The foundation of your cookies. Meanwhile, you can substitute with cake flour for extra tenderness.
- Fine salt (¼ teaspoon): Balances the sweetness perfectly.
- Whole milk (1-2 tablespoons): Helps achieve the right piping consistency. Instead, you can use heavy cream for richer cookies.
For the Chocolate Coating:
- Semisweet or dark chocolate (7 oz, finely chopped): I prefer dark chocolate for the perfect sweet-bitter balance. However, milk chocolate works wonderfully if you prefer sweeter treats.
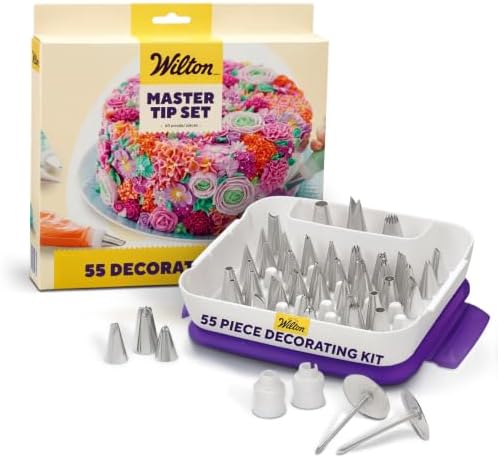
- Starter Piping Set: The Master Cake Decorating Piping Tips set comes with an assortment of round, star, petal, leaf, and…
- Complete Decorating Set: The Master Cake Decorating Piping Tips Set is for DIY cake, cupcake, and cookie decorating
- Cake Art Tools: This classic cupcake decorating kit comes with stainless steel tips that work with both buttercream fros…
Step-by-Step Instructions for Chocolate-Dipped Butter Cookies
Making these chocolate butter cookies is actually quite straightforward once you get the hang of piping. Nevertheless, I’ll walk you through each step to ensure perfect results every time.
Prepare Your Workspace
First, line two baking sheets with parchment paper. Next, fit your sturdy piping bag with a large open-star tip. Meanwhile, check that your butter is soft enough to indent easily but still holds its shape. Finally, measure out all your remaining ingredients so everything’s ready to go.
Mix the Cookie Dough
Beat the softened butter and powdered sugar together for about 2 minutes until the mixture becomes smooth and creamy. Then, beat in the egg yolk and vanilla extract until well combined. Subsequently, add the flour and salt, mixing on low speed just until everything comes together. Finally, mix in 1 tablespoon of milk, adding more teaspoon by teaspoon if needed for proper piping consistency.
Pipe the Cookie Rings
Working with small amounts of dough at a time, pipe rings approximately 2 inches wide onto your prepared baking sheets. Moreover, leave a small opening in each center and gently join the ends. Additionally, space cookies about 2 inches apart to prevent spreading. Once piped, refrigerate the cookies for 30 minutes to help them hold their shape during baking.
Bake to Golden Perfection
Preheat your oven to 350°F while the cookies chill. Then, bake one sheet at a time on the middle rack for 12-15 minutes. Consequently, the edges should be lightly golden while the tops remain pale gold. Let cookies rest on the baking sheet for 5 minutes before transferring to a wire rack to cool completely.
Create the Chocolate Coating
Place about two-thirds of your chopped chocolate in a completely dry, microwave-safe bowl. Heat in 20-second intervals, stirring between each burst, until just melted. Then, add the remaining chocolate and stir until smooth. This tempering method creates a glossy finish that won’t bloom.
Dip and Set
Hold each cooled cookie by one side and dip the opposite half into the melted chocolate. Allow excess chocolate to drip off before placing on parchment paper. Finally, let the chocolate firm up in a cool room, or refrigerate for 10-15 minutes until completely set.
Creative Serving Ideas
These elegant chocolate-dipped butter cookies shine on any dessert table. Furthermore, I love arranging them on a light-colored plate with the chocolate halves facing up for maximum visual impact. Additionally, they pair beautifully with coffee, tea, or even a glass of cold milk. Moreover, try serving them alongside fresh berries for a sophisticated dessert platter that always impresses guests.
Pro Tips for Perfect Chocolate-Dipped Butter Cookies
- Temperature matters: Ensure your butter is properly softened but not melted. Otherwise, your cookies won’t hold their piped shape properly.
- Chill before baking: The 30-minute refrigeration step is crucial for maintaining those beautiful ridged edges during baking.
- Don’t overbake: These cookies continue cooking on the hot pan, so remove them when edges are just lightly golden.
- Dry chocolate bowl: Even a drop of water can cause your chocolate to seize, so make sure everything is completely dry.
- Perfect dipping technique: Hold cookies firmly but gently, and let excess chocolate drip back into the bowl for clean lines.
- Storage secret: Store in an airtight container with parchment between layers to prevent chocolate from sticking.
Frequently Asked Questions
Can I make these chocolate-dipped butter cookies ahead of time?
Absolutely! These cookies actually improve after a day as the flavors meld together. Store them in an airtight container for up to 5 days. However, I recommend adding the chocolate coating no more than 2 days before serving for the best appearance and texture.
What if I don’t have a piping bag for my butter cookies?
You can definitely make a DIY piping bag using a sturdy plastic bag with the corner cut off. Alternatively, roll the dough into balls and flatten them slightly with a fork for a different but equally delicious texture. Nevertheless, the piped rings do create that signature professional look.
Why did my chocolate coating turn white or streaky?
This usually happens when chocolate gets too hot or comes into contact with moisture. Therefore, always use the gentle melting method I described and ensure all bowls and utensils are completely dry. Additionally, letting cookies cool completely before dipping prevents condensation issues.
Can I use different types of chocolate for coating?
Certainly! While I prefer dark chocolate for its sophisticated flavor balance, milk chocolate creates sweeter treats that kids especially love. Furthermore, white chocolate offers an elegant alternative, though it requires even more careful melting. Moreover, you could even try a combination for variety.
Why These Cookies Will Become Your New Favorite
These chocolate-dipped butter cookies strike the perfect balance between elegant presentation and simple execution. Moreover, they’re incredibly versatile for any occasion, from casual coffee dates to fancy dinner parties. Additionally, the combination of buttery vanilla cookies with rich chocolate creates a flavor profile that pleases everyone. Furthermore, they keep well and actually taste even better the next day.
My Cookie Development Journey
I’ll be honest, my first attempt at these chocolate butter cookies was a complete disaster! The dough was too soft, and my piped rings spread into sad, flat pancakes. However, after several trials, I discovered that chilling step makes all the difference. Additionally, I learned that the milk amount varies depending on humidity, so start with less and add more as needed. Now, these have become my go-to impressive dessert that never fails to wow guests.