
Homemade Crispy Vanilla Waffle Cones are honestly one of those magical kitchen creations that make you feel like a total dessert wizard! I remember the first time I made these beauties, I was absolutely amazed at how something so simple could taste infinitely better than store-bought versions. The incredible aroma that fills your kitchen while making these golden treats is pure heaven.
What Are Homemade Crispy Vanilla Waffle Cones?
These delicate, crispy treats are essentially thin vanilla wafers that get shaped into perfect cone forms while they’re still warm and pliable. Unlike thick waffles, these waffle cones have a delightfully light texture that provides the perfect vessel for your favorite ice cream flavors. Furthermore, they offer a sweet vanilla taste that complements any frozen dessert beautifully.
Essential Ingredients You’ll Need
Making these homemade crispy vanilla waffle cones requires just a handful of pantry staples. Additionally, most of these ingredients are probably sitting in your kitchen right now! Here’s everything you need for this delicious ice cream cone recipe:
- Large eggs (2) – These provide structure and help create that perfect golden color. Room temperature eggs work best for smooth mixing.
- Granulated sugar (½ cup/100g) – Creates sweetness and helps achieve that beautiful caramelized exterior. You can substitute with caster sugar if needed.
- Unsalted butter (¼ cup/55g) – Melted and slightly cooled, this adds richness and helps create crispy texture. Salted butter works too, just reduce the added salt.
- Whole milk (¼ cup/60ml) – Provides moisture and helps create smooth batter consistency. 2% milk can work as a substitute.
- Vanilla extract (1 teaspoon) – Pure vanilla gives these cones their signature flavor. Vanilla paste or vanilla bean works beautifully too.
- All-purpose flour (⅔ cup/85g) – The foundation that creates structure. Make sure to measure accurately for best results.
- Salt (¼ teaspoon) – Balances the sweetness and enhances all the other flavors in your homemade waffle cones.
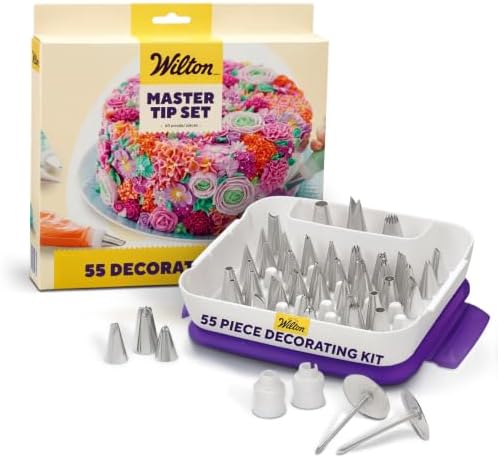
- Starter Piping Set: The Master Cake Decorating Piping Tips set comes with an assortment of round, star, petal, leaf, and…
- Complete Decorating Set: The Master Cake Decorating Piping Tips Set is for DIY cake, cupcake, and cookie decorating
- Cake Art Tools: This classic cupcake decorating kit comes with stainless steel tips that work with both buttercream fros…
Step-by-Step Instructions
Creating these homemade crispy vanilla waffle cones is surprisingly straightforward once you get the hang of it. However, timing is absolutely crucial since you need to shape them while they’re still warm. Let me walk you through each step:
Whisk eggs and sugar: Start by whisking the eggs and sugar in a mixing bowl for about 1-2 minutes. You’ll notice the mixture becomes slightly pale and foamy, which means you’re incorporating air properly. This step is crucial for creating light, crispy waffle cones.
Mix the batter: Next, whisk in your melted butter, milk, and vanilla extract until well combined. Then, add the flour and salt, stirring until the mixture becomes completely smooth. The batter should pour in a thick ribbon when lifted with your whisk. Allow it to rest for 5 minutes while your cone maker heats up.
Cook until golden: Preheat your waffle cone maker according to the manufacturer’s instructions. Lightly grease it if required by your specific model. Add approximately 2 tablespoons of batter, adjusting based on your machine’s capacity. Close the maker and cook for about 1-2 minutes until the wafer becomes evenly golden and thin.
Roll while warm: This is where the magic happens! Immediately transfer the hot wafer to a clean kitchen towel. Using the towel to protect your fingers from heat, carefully wrap the wafer around your cone mold, overlapping the edges slightly. Press the seam firmly and pinch the bottom closed. Hold for approximately 20-30 seconds until the shape sets completely.
Cool until crisp: Gently slide out the cone mold and place your freshly shaped cone seam-side down on a wire rack. Allow it to cool completely before handling. Meanwhile, repeat this process with the remaining batter, remembering to shape each wafer immediately after cooking for perfect homemade crispy vanilla waffle cones.
Serve and enjoy: Once cooled, arrange your beautiful cones on a serving plate. Remember to fill them only when you’re ready to eat to maintain that incredible crispiness that makes these ice cream cones so special.
Creative Ways to Serve Your Cones
These homemade crispy vanilla waffle cones are incredibly versatile beyond just holding ice cream. Try filling them with fresh berries and whipped cream for an elegant dessert. Additionally, they make fantastic vessels for chocolate mousse or even savory options like chicken salad for unique appetizers. You can also dip the rims in melted chocolate and roll in chopped nuts for extra indulgence.
Pro Tips For Perfect Waffle Cones
- Temperature matters: Make sure your waffle cone maker is properly preheated. A properly heated surface creates that perfect golden color and crispy texture.
- Work quickly: Shape your cones immediately while the wafers are still warm and pliable. Once they cool, they become too brittle to shape.
- Practice makes perfect: Don’t worry if your first few attempts aren’t perfect. The shaping technique improves with each cone you make.
- Batter consistency: If your batter seems too thick, add a tablespoon of milk. Too thin? Add a bit more flour gradually.
- Storage secrets: Keep finished cones in an airtight container with parchment paper between layers to prevent sticking.
- Humidity awareness: Avoid making these on very humid days as moisture can affect the crispiness of your homemade waffle cones.
Frequently Asked Questions
Can I make these without a waffle cone maker? Unfortunately, a specialized waffle cone maker is really necessary for achieving the proper thin, crispy texture. Regular waffle makers create waffles that are too thick for proper cone shaping. However, you can sometimes find affordable cone makers online or at kitchen stores.
How long do homemade crispy vanilla waffle cones stay fresh? When stored properly in an airtight container at room temperature, these cones maintain their crispiness for up to 3 days. Keep them away from humidity and moisture, which can make them soggy. For best results, fill them just before serving.
What if my waffle cones aren’t crispy enough? This usually happens when the batter is too thick or the cooking time is too short. Make sure your batter has the proper consistency and cook the wafers until they’re evenly golden. Also, ensure they cool completely on the wire rack, which helps achieve maximum crispiness.
Can I make different flavored versions? Absolutely! You can add cocoa powder for chocolate waffle cones, or try different extracts like almond or lemon. However, keep in mind that additions might slightly change the texture, so you may need to adjust the liquid ingredients accordingly.
Why These Cones Will Become Your New Favorite
These homemade crispy vanilla waffle cones offer an unmatched freshness and flavor that store-bought versions simply can’t compete with. Moreover, you control every ingredient, ensuring quality and customization options. The satisfaction of creating these beautiful, edible vessels from scratch is incredibly rewarding. Plus, your guests will be absolutely amazed when you serve ice cream in your own handmade cones!
My Kitchen Adventures
I’ll be honest, my first batch of homemade crispy vanilla waffle cones was a complete disaster! I let the first wafer cool too much before shaping, and it cracked into pieces. However, by the third cone, I finally got the timing right. Now I can shape them like a pro, and the whole process has become incredibly therapeutic. There’s something so satisfying about watching that golden wafer transform into a perfect cone shape right before your eyes.